Gravity Forms to Pardot Integration
A Guide for Successful Form Building
Step 1 :: Building a Form with Gravity Forms
For Gravity Forms documentation and training, please review the following resources:
- Official documentation from Gravity Forms
- YouTube tutorial – The only part of the video that applies is about creating the forms themselves. You will put them on your pages a little differently from the method this video shows.
Building a form requires 3 main tasks:
- Adding all the appropriate fields
- Mapping all required form logic
- Setting up the correct confirmations after the form submits successfully. Pardot will handle everything else.
Steps for Building a Form in Gravity Forms
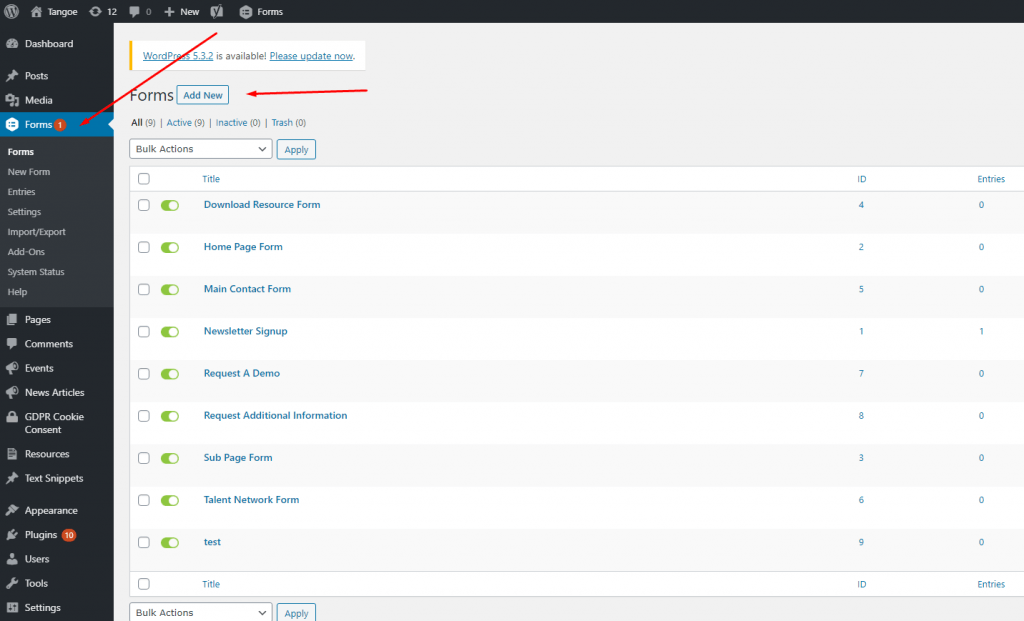
- Choose “Forms” from the WordPress sidebar menu, and select “Add New.”
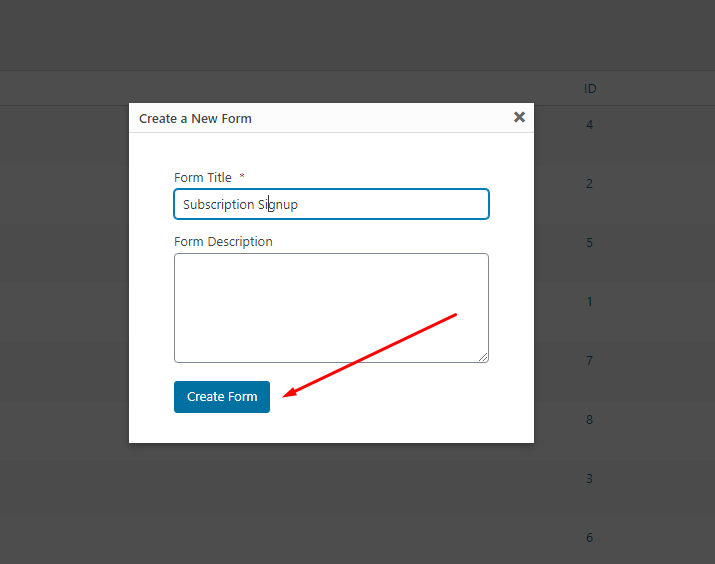
2. Give your form a name, and click “Create Form.”
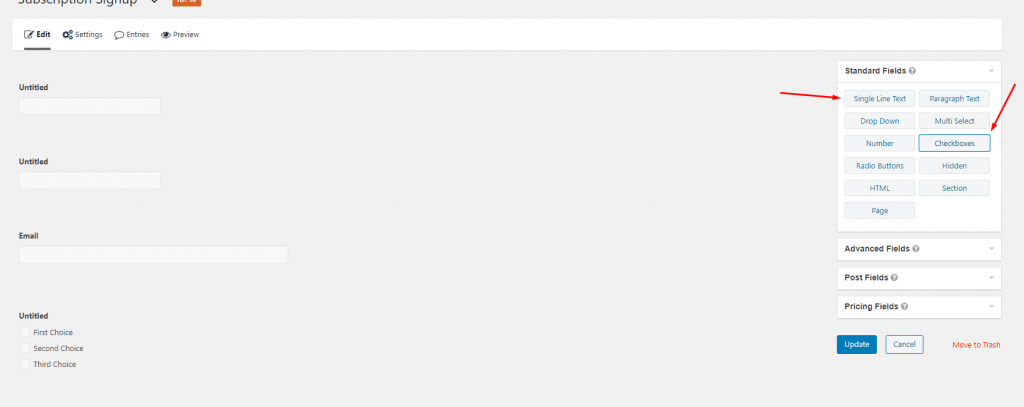
3. Drag the fields you want from the right-hand side to the left-hand side of the page.
- In this example, we are only going to add a first name, last name, and email field, just to keep it simple. We will add a checkbox where users can choose to opt in to extra email notifications.

4. Add your fields, and give them some information.
- The example shows“Single Line Text” fields and a “Checkboxes” field from “Standard Fields”; and an “Email” field from “Advanced Fields.” We ignored the default “Name” field, as we will have more flexibility with resulting data if we have separate “First Name” and “Last Name” fields.
5. Set up your fields.
- Give your fields names, and decide if they are required. Conditional logic is also possible. Below are the first name, last name, and email fields.
- Gravity forms will handle all form field logic, including field validation, required fields, and any conditional logic. For instance, if you have “Business Name” field, you can set the field to be hidden unless a user indicates they are interested for business reasons and not personal.

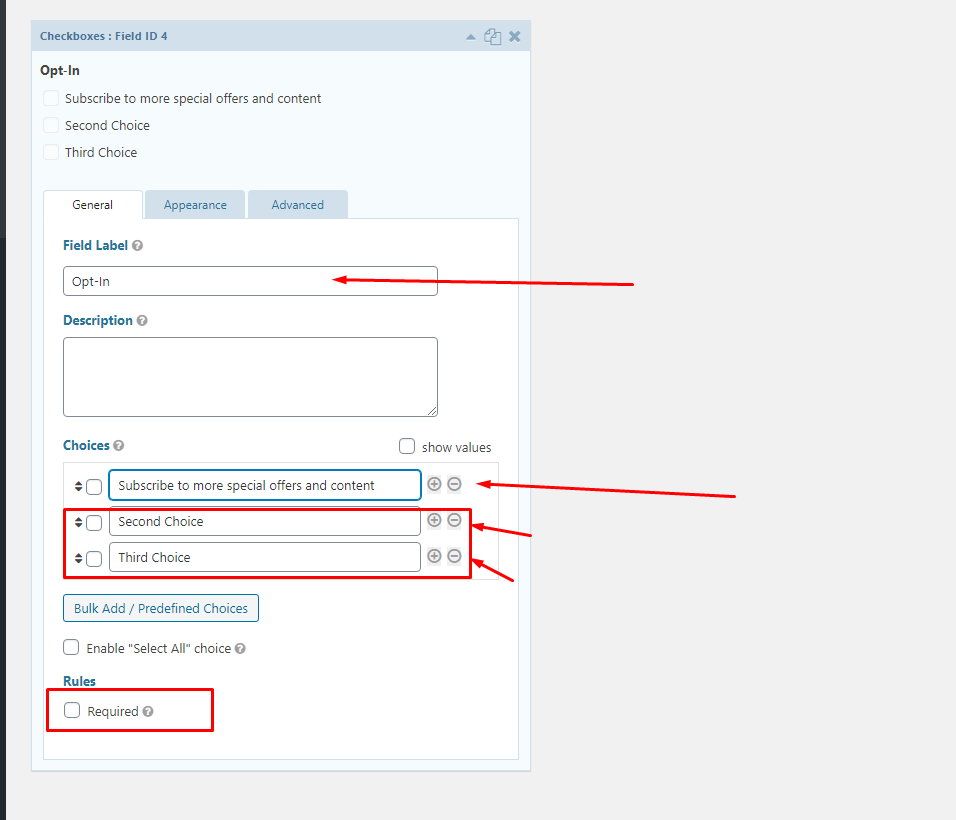
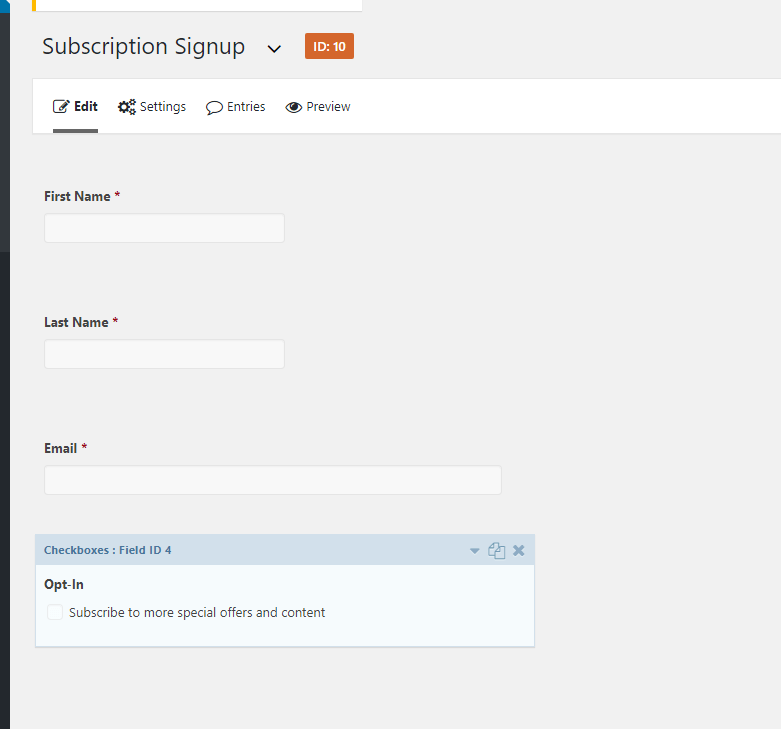
6. Make your “Opt in for More Information” checkbox.
- First, give your checkbox a name, and choose if it’s required.
- For this example, we don’t want it to be required, as that would give the user only one option.
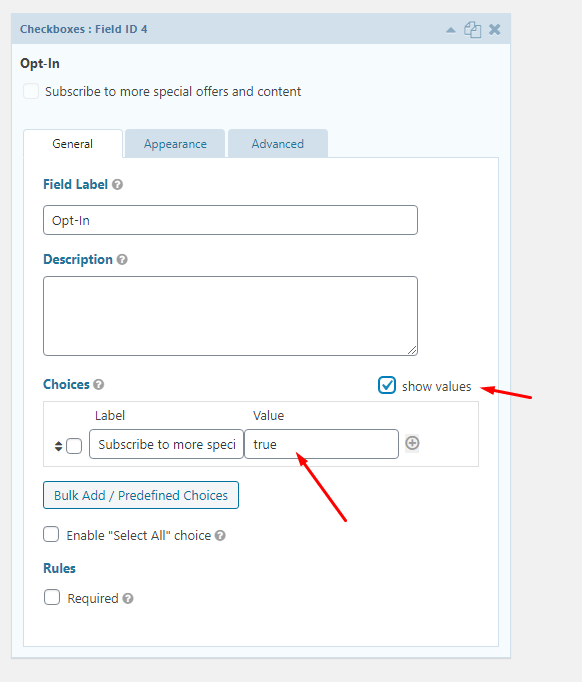
- Whenever you create a checkbox, it defaults to 3 empty values. Remove unnecessary values by clicking on the “minus” sign next to them. Add additional values using the “plus” sign instead.
- (Opt in checkbox steps, continued.) At any point, you can preview your form to ensure it looks accurate.
- Set a value for the checked boxes.
- Check the checkbox that says “show values.”
- Then add the “true” value into the field.
- If we don’t set a “true” or “false” value for each item, the default label value (e.g., “Subscribe to more special offers and content) will get sent to where the form is being processed. In this case, we are passing all the form values to Pardot, so we need to see within Pardot whether someone chose to opt in (true) or not (false).
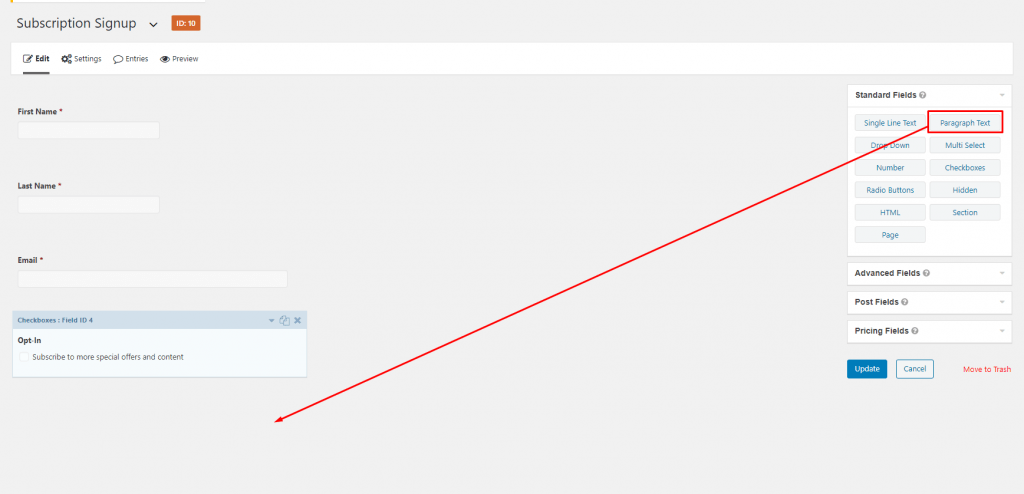
7. Add conditional logic if necessary. For this example, let’s say, if a user chooses to opt in to more special offers, you’d like them to add their home address in a message box. Let’s create that message box field.
- Add the text area (message box/paragraph text) to the form, as you did with previous fields. Message boxes are technically called a “text area” according to the HTML that would create them.
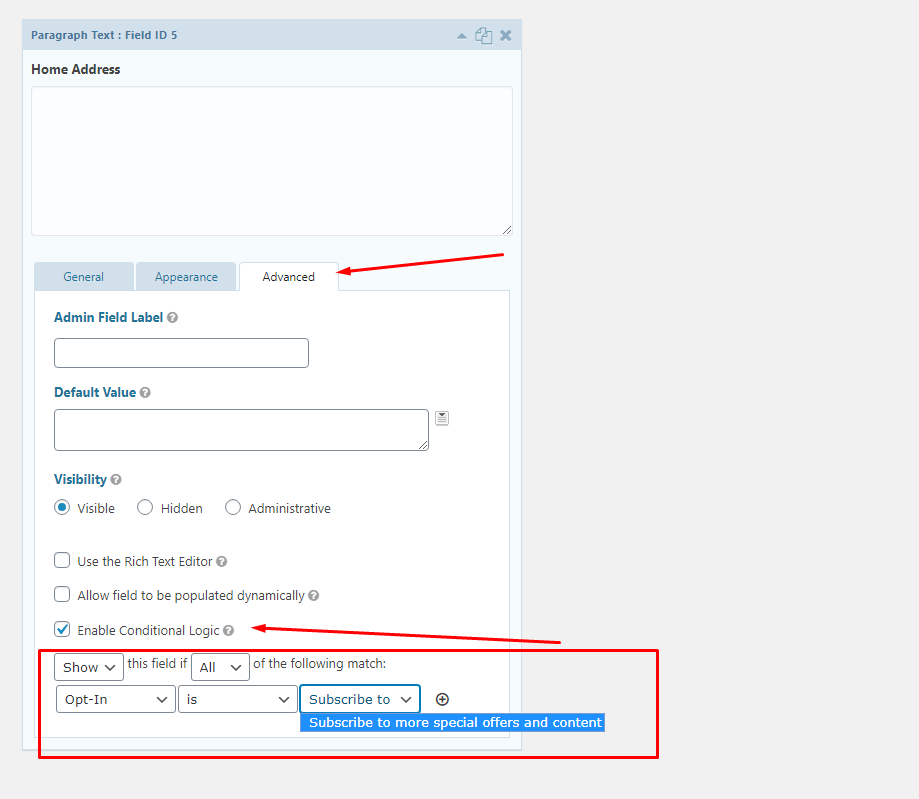
- Now, exactly like before, give your message box a name. This one is called “Home Address.” Do not make it required, since the user will only see it conditionally.

- Next, create the conditional logic. This is when we tell the form, “If a user selects to opt in, then show the ‘Home Address’ field.”
- Click into the “Advanced” tab, select the checkbox next to “Enable Conditional Logic,” and then add the validation logic. In this case, you want to “Show” this field if “All” of the following match: If your “Opt-In” field “is” “Subscribe to….” (Even though we previously set the “Subscribe to…” field values to True and False, the conditional logic will still show the original label text.)
Form Building Is Now Complete! Here’s a Summary
You are now done with all the form-related logic and adding the appropriate fields.
Now, since we don’t need any conditional logic for the rest of this documentation, we’ll erase our “Home Address” field and continue with the remainder of these instructions. Our form will go back to the original four fields: First Name, Last Name, Email, and Opt-In.
To revisit what we’ve gone over so far, these are the three things Gravity Forms does for you:
- Applies all form-required logic you ask for (done)
- Adds all the fields you choose (done)
- Provides the correct confirmations after the form submits successfully (not done yet)
The only thing left is number 3: setting up the correct confirmations after the form submits successfully. To do that, jump over to Pardot and log in.
Keep reading to get form handler setup instructions.
Step 2 :: Creating a Form Handler in Pardot
A “Form Handler” handles the form data we receive from our Gravity Form and brings the contact into Pardot so we are able to bring that contact into the sales funnel appropriately.
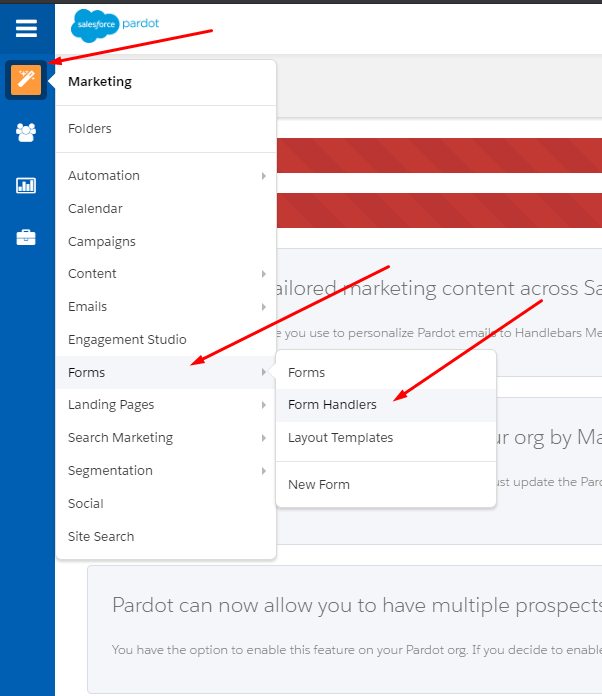
- Once you are logged into Pardot, go to Marketing > Forms > Form Handlers in the menu.
2. Click on “Add Form handler” to get started.

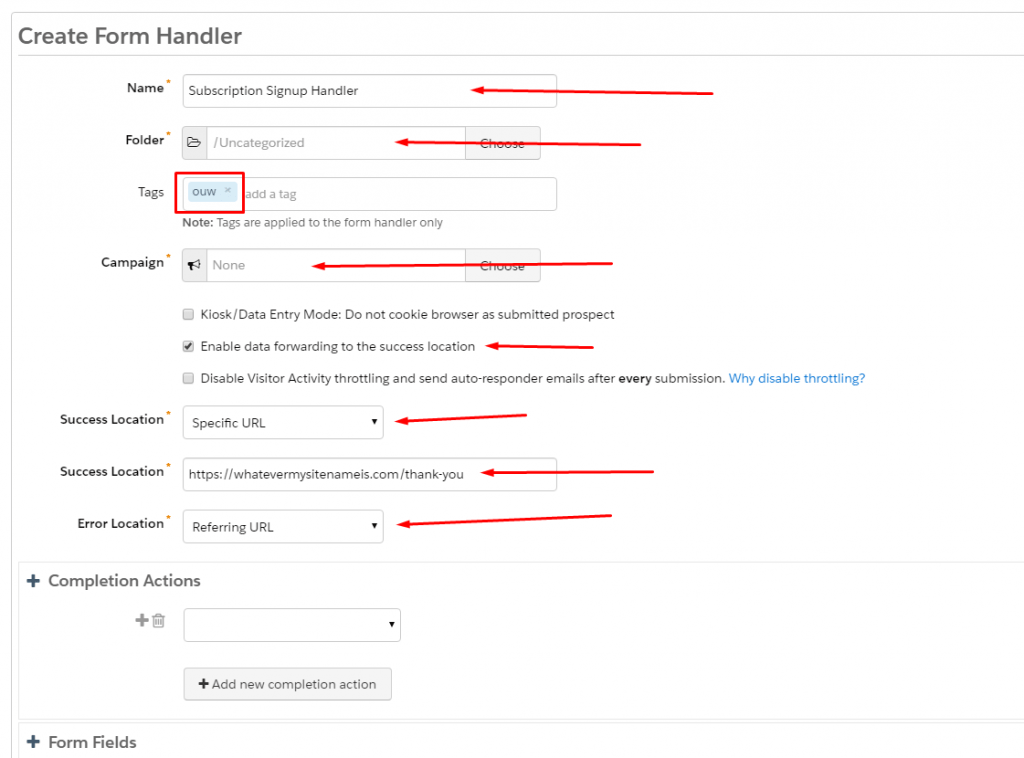
3. Give your Handler a Name, Folder and Campaign.
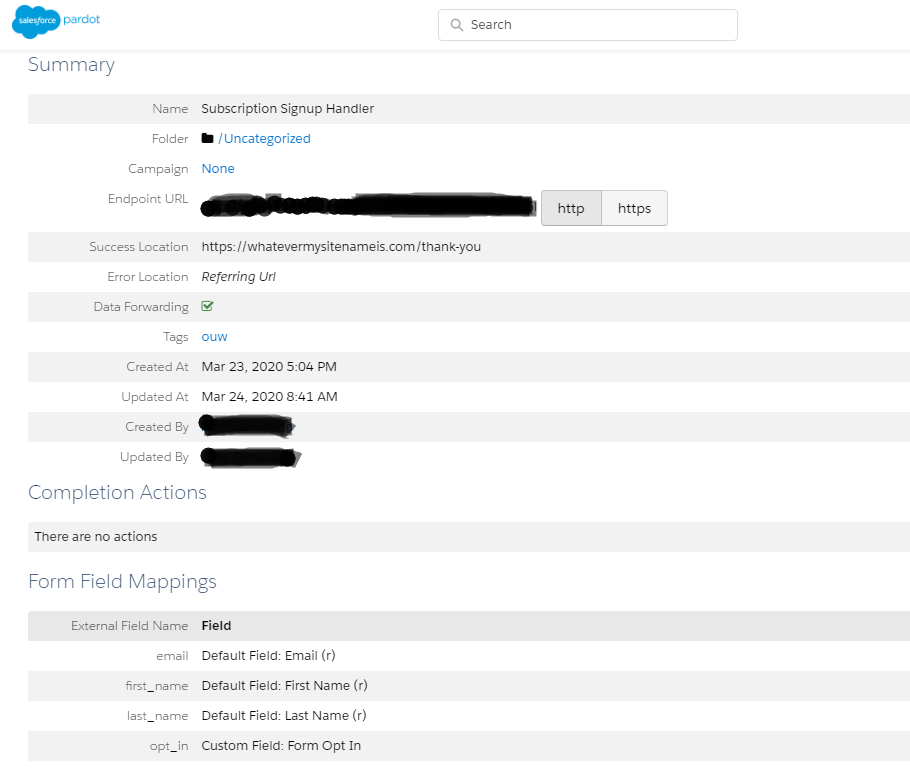
- We named the Handler “Subscription Signup Handler” for the purposes of this example. We chose a Folder of “Uncategorized” because this is a demo, but use folders to organize yourself for success. We set the Campaign to “None” for this example, but do fill out these details in a live situation.
4. Assign a tag so you can search for your Handler if needed.
- We added the tag “OUW” because we usually label things for Oneupweb. It’s not meant to be a shameless plug; we just label the work so we can apply it in other situations later.
5. Check the checkmark next to “Enable data forwarding to the success location.” (If we don’t check that box, the user will get stuck on the form page.)
6. Choose your Success Location, and add the page you want the user to be redirected to after they fill out your form.
- We chose the Success Location of “Specific URL,” which caused a second Success Location box to show. This is where you add the page the user should see after they submit the form. In this case, whoever completes the Subscription Signup form would expect a thank-you page. We made up a false URL for the example.
- Ideally, keep your thank-you page URLs in a folder structure that shows what the form landing page was: https://mysitename.com/landing-page-slug/thank-you. This will enable simpler tracking within both Pardot and Google Analytics!
7. Set the Error Location to “Referring URL.”
We want Gravity Forms to handle all form errors or validation, not Pardot. We are only going to send form fills to Pardot if they are valid.
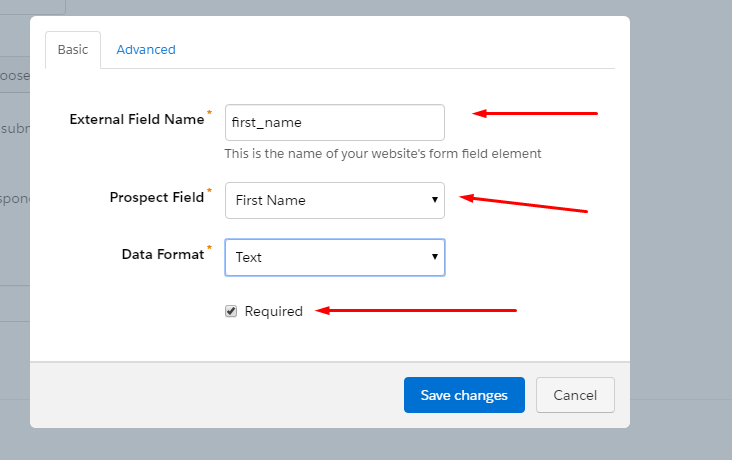
8. Tell your Handler what fields it should expect.
- First, set the External Field Name for one field in your form; create rules for yourself so you always do this the same way! For example, we suggest that these external names are always lowercase and use underscores instead of spaces; this leaves no room for error or inconsistency.
- Then set the Prospect Field, which should be the exact label of the corresponding field within the actual form. In this case, it will be First Name.
- If you select the Required checkbox here, make sure you also selected Required in Gravity Form
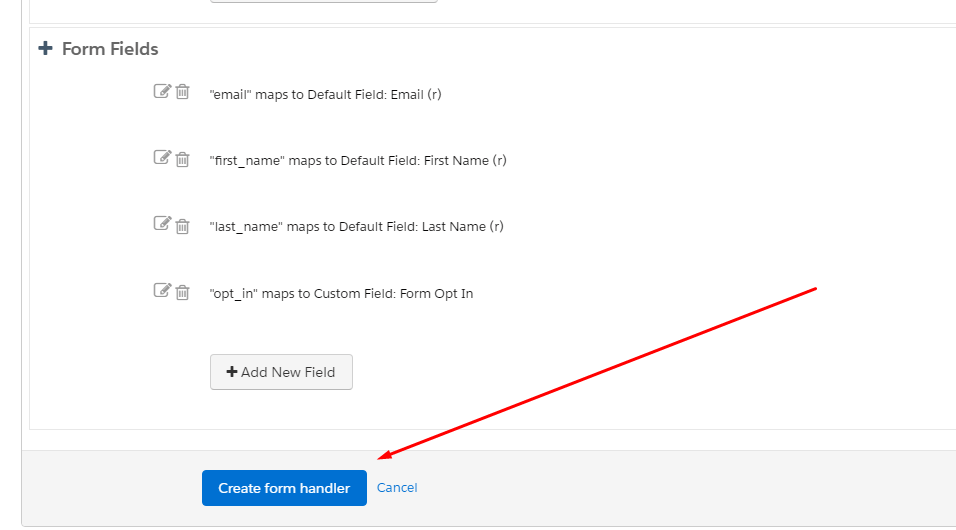
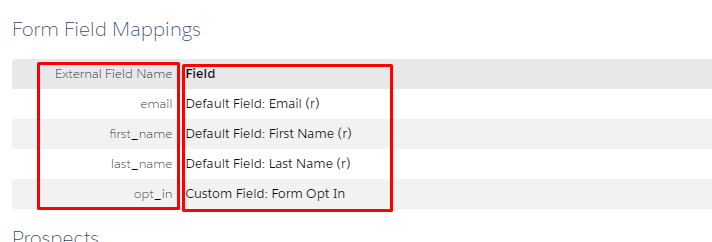
9. Repeat this process for each remaining field, mapping within Pardot where each field goes. In our example:
- “first_name” will map to “First Name”
- “last_name” will map to “Last Name”
- “email” will map to “Email”
- “opt_in” will map to “Form Opt In”
10. Click “Create Form Handler” to save your work.
11. Review all the settings created and all the form fields mapped on one screen.
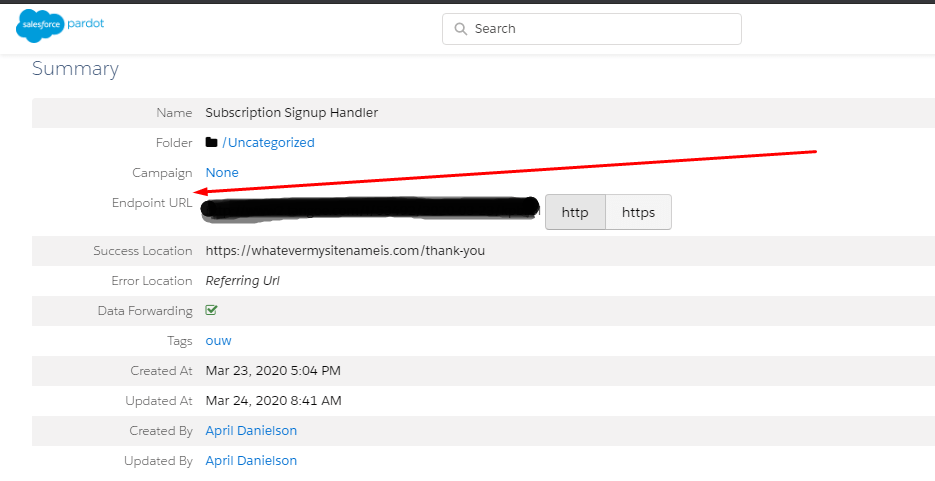
12. Next, take your “Endpoint URL” and your “Form Field Mappings,” and copy them over to Gravity Forms so that Gravity Forms can successfully send data to Pardot.
- Copy your “Endpoint URL” (it is located right at the top of the summary).
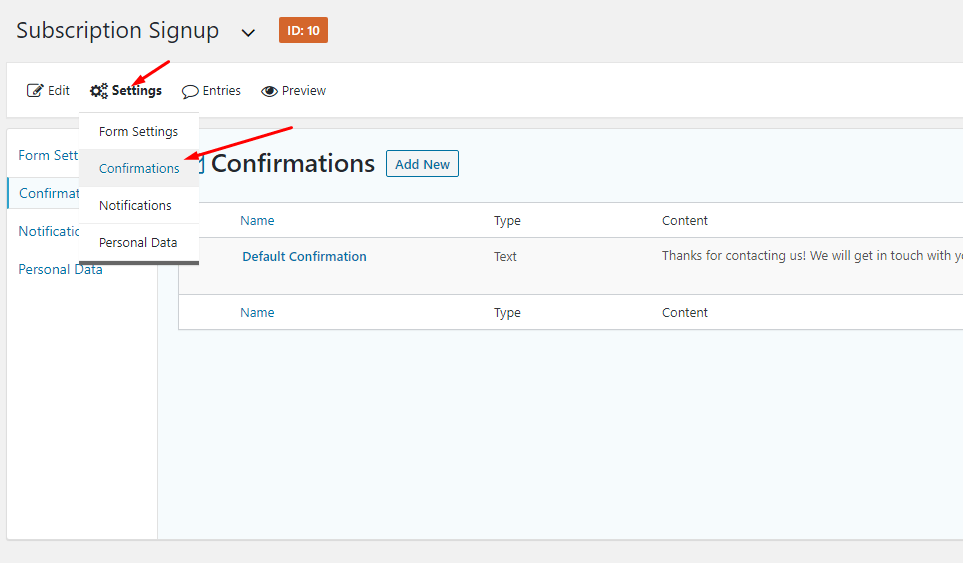
- Go back to Gravity Forms, and go to Settings > Confirmations.
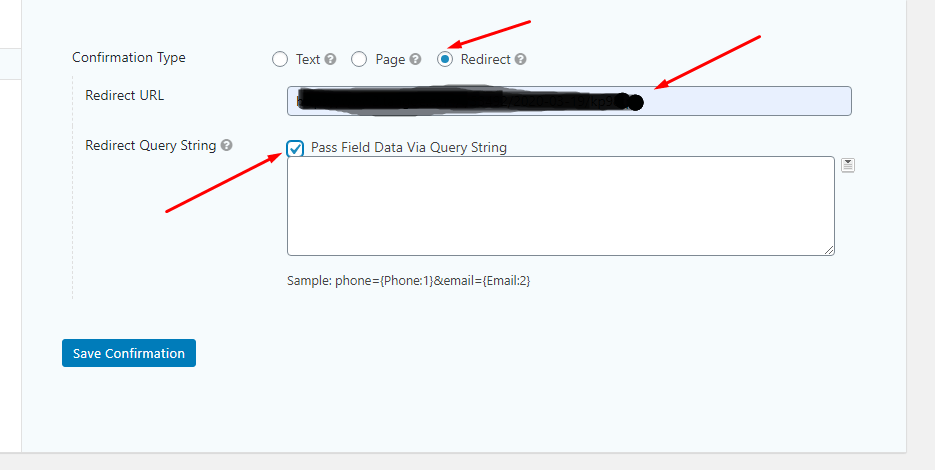
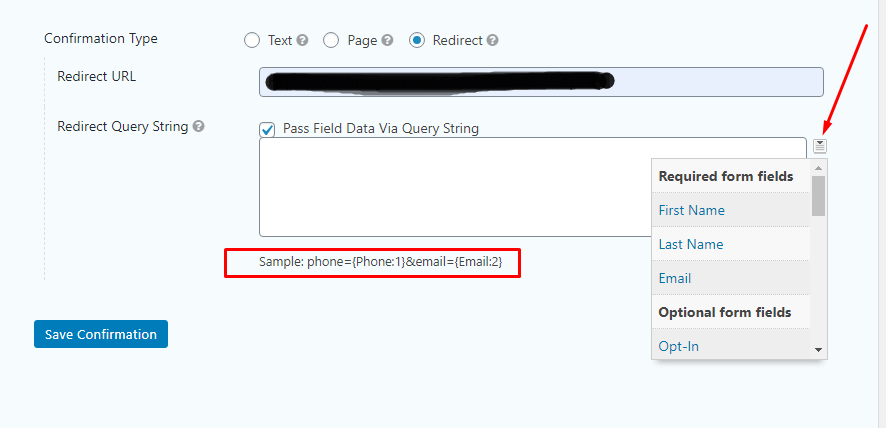
Set the “Confirmation Type” to Redirect; then paste your “Endpoint URL” that was copied from Pardot into the “Redirect URL” area. Check the checkbox that says, “Pass Field Data Via Query String.”
13. Now you have one more step inside of Gravity Forms – setting up the variables that get passed to Pardot.
- Remember: The variables we pass say, “this name = this value.” This is a very critical step and is often where errors happen, due to typos. You want to exactly match the names you set up inside of Pardot.
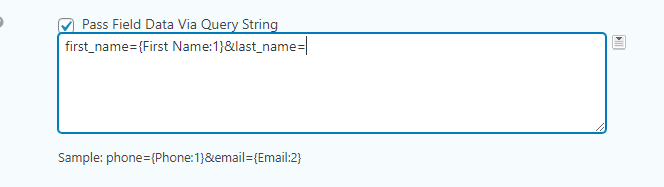
- The Sample text below the “Redirect Query String” area of the “Confirmation Settings” (shown in the below screenshot) is a perfect example of what you are going to do. There is also a dropdown icon that will tell you which Gravity Form fields are available.
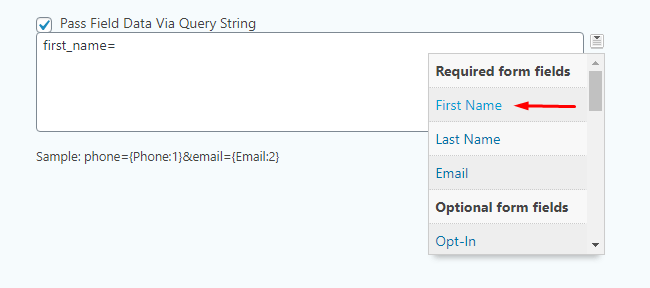
14. First, type “first_name=” (or whatever your External Field Name is in the Pardot handler, with an =). Then select First Name (the corresponding form field) from the dropdown.
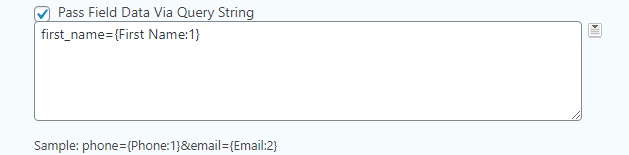
- After you click “First Name” from the dropdown, the finished string will look like this.
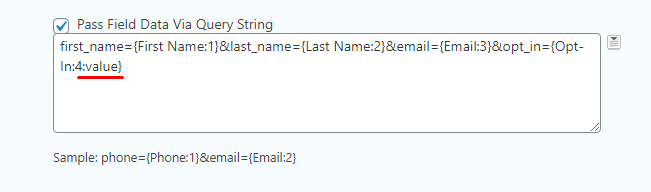
15. Repeat for every field you want to pass. Don’t forget to put an “&” in between the fields.
16. For the “Opt In” field, make sure it sends the values you set up (True or False) and not the label.
- To do this, add “:value” to the string. In other words, change {Opt-in:4} to {Opt-in:4:value}.
Handler Creation Is Now Complete!
Now you can add your Gravity Form to your web page and test it out. Those instructions are below.
Step 3 :: Adding Your Gravity Form to a Page
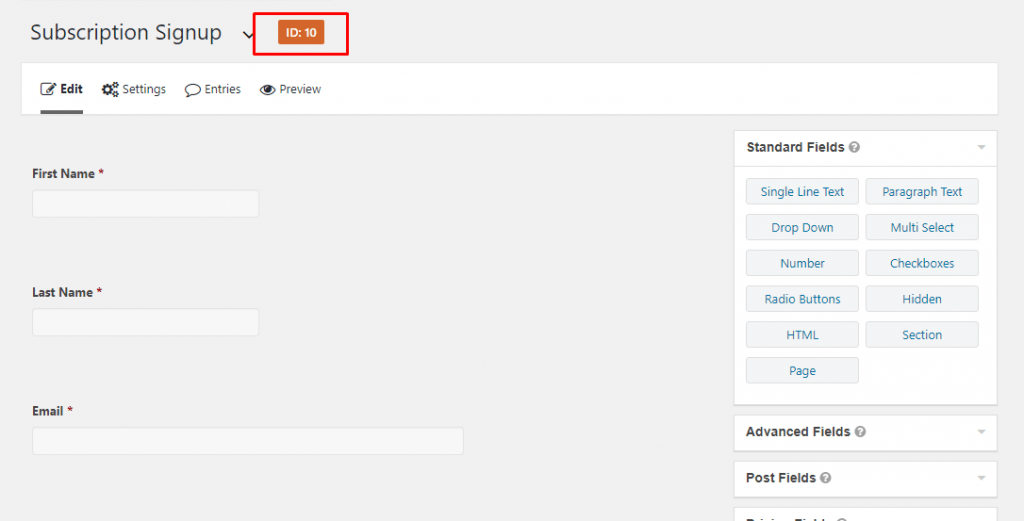
- Start by creating a shortcode for the form. (Refer to Gravity Forms documentation that we linked at the beginning of this document.) Insert the correct form ID into the shortcode. It follows this pattern:
Oops! We could not locate your form.
. If you look at the form edit screen, you can see the ID at the top of the section.
2. Make a new page in WordPress for testing purposes, and add a shortcode block to it. Insert your shortcode, and then save the page.
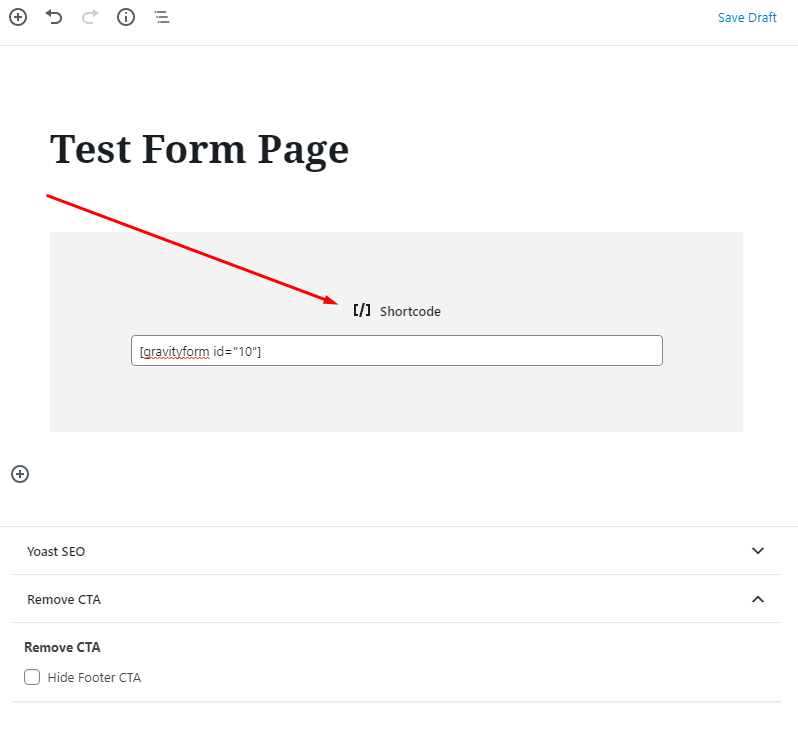
3. View the page you created with the form shortcode on it. You will see a live version of your form, exactly the way it will appear on your website.
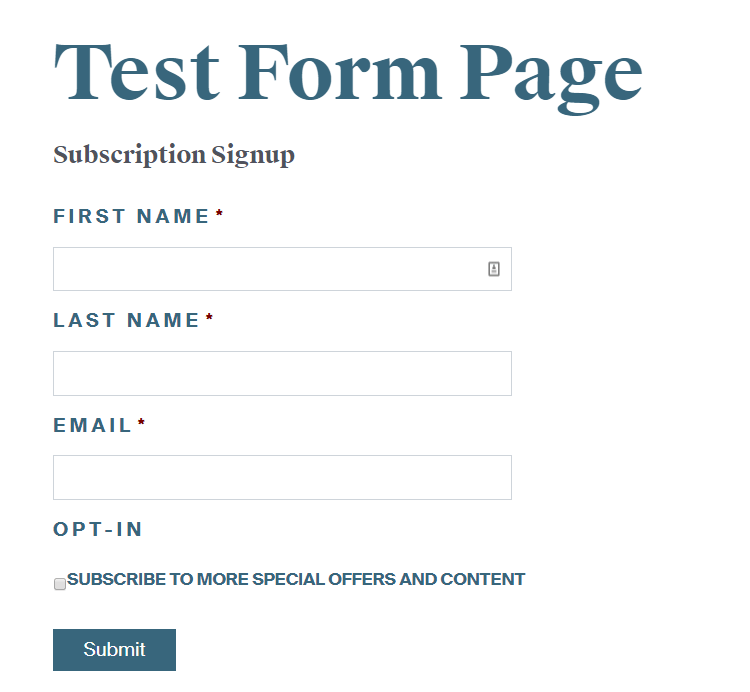
4. Test the form to ensure it works. Complete the form, and hit “Submit.” The page should redirect to the “Success Location” that was set up inside of Pardot. (In this example, we used a thank-you page URL.)
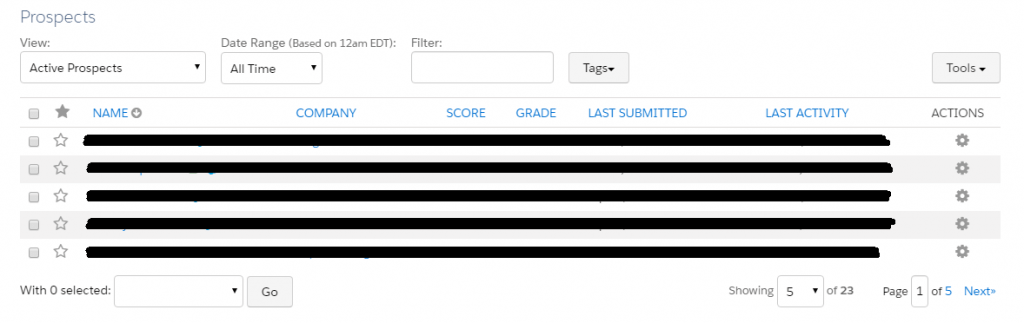
5. Check inside Pardot to make sure your form came through successfully. Go to the bottom of your Pardot Form Handler screen. Under the Form Field Mappings section, find the “Prospects” area where contacts are listed.
6. Click on the individual contact (i.e., your own test name/submission) to ensure the form data for each field came through accurately.
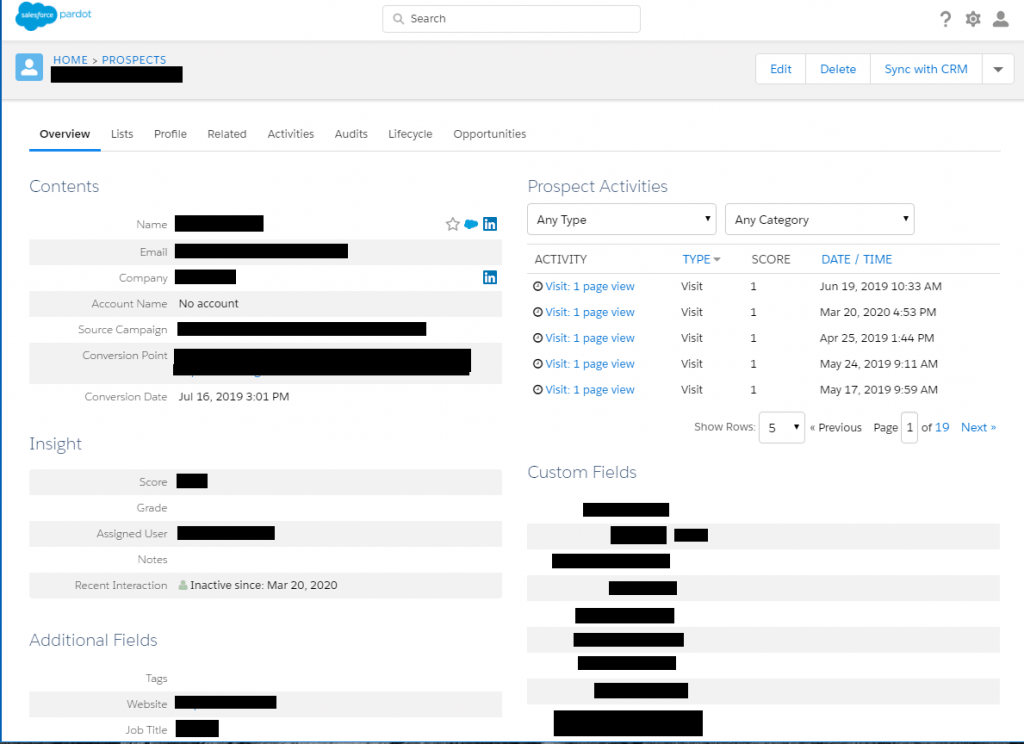
- From here, you can perform other actions on a contact, including but not limited to:
- Add them to your sales funnel
- Put them on a list for a workflow, such as lead warming
- Assign them a score
- There are so many things you can do at this stage.
- Remember: Gravity Forms is only for handling forms. Pardot does everything that happens after a form submission.
You’re done!
Now you can apply this form to whatever page(s) you’d like it to appear on. Check out our website design and development archives for more or contact us if you have other questions.